
Your 6-step guide to changing a flat
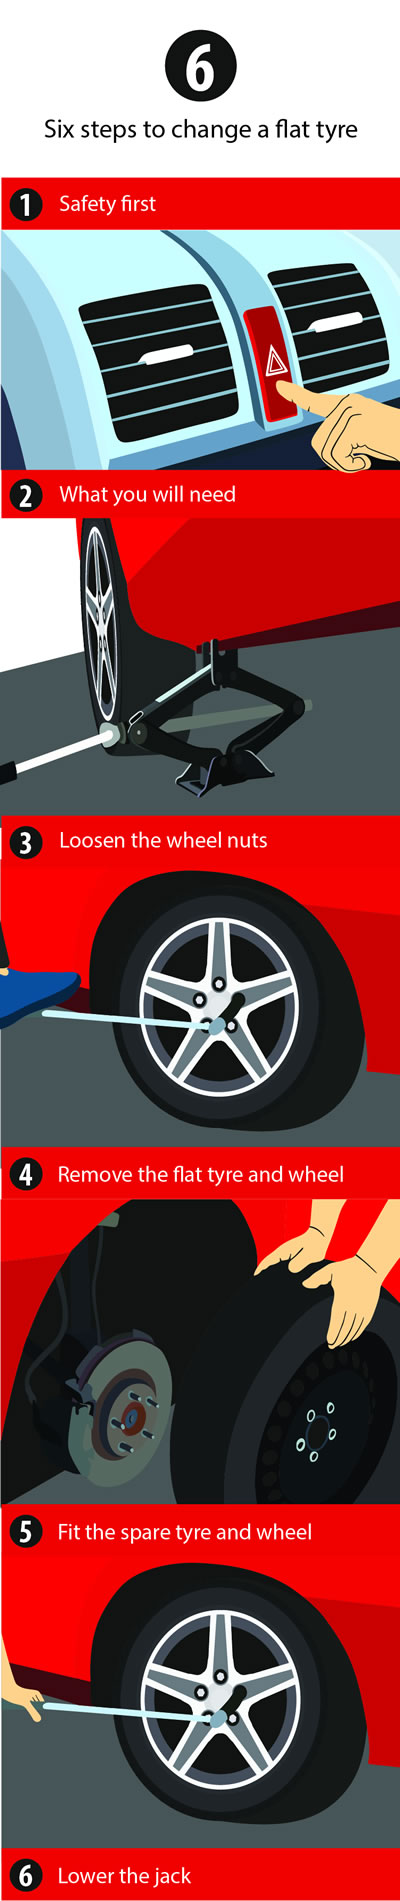
1. Safety first
Make sure you drive to a safe area before you change your flat tyre. Driving a few hundred meters on a deflated tyre to move away from passing traffic and other hazards will ensure you are safe without unduly damaging the wheel rim.
Find a hard and flat surface to jack up the car. Before you start, put the car in park (or in gear for a manual), make sure the handbrake is on and turn on the hazard lights to warn other drivers.
If you can, place a chock such as a piece of wood behind a tyre on the opposite side of the car. Now you’re safe and ready to start.
2. What you will need
The tools to change your flat tyre will usually be with the spare wheel and tyre in the boot. The owner’s manual will tell you where to find the jack and wheel brace – the tool to undo the wheel nuts – if you can’t see them.
The owner’s manual will tell you the right place to put the jack for your car. It’s important that these ‘jacking points’ are used because they’re strong enough to hold up the car – jacking beneath the wrong part of the car can cause damage. The jacking points are usually also marked with small notches or grooves on the underside of your car.
Once the jack is in place, slowly turn the handle clockwise until you remove some, but not all, of the car’s weight from the flat tyre.
Continue to turn the jack handle until the flat tyre is about 5cm off the ground.
3. Loosen the wheel nuts
The right technique to loosen the wheel nuts is important to ensure you don’t hurt yourself. Place the wheel brace on one of the wheel nuts and, with a straight arm and a straight back, apply force to the nut in an anticlockwise direction, to slightly loosen each of them in turn.
If the nuts are tight, using your foot on the wheel brace can help you get them undone. Attach the wheel brace so the lever arm is horizontal and apply your body weight.
4. Remove the flat tyre and wheel
You will now be able to easily remove the loose wheel nuts using the wheel brace or your fingers and remove the wheel. If the wheel does not come free, it could be that corrosion has caused the wheel to stick. If this happens, put one nut back on the wheel and give the wheel a kick to free it. Gently remove the wheel.
Take your spare wheel out of the boot and secure the flat tyre and wheel in its place.
5. Fit the spare tyre and wheel
With the tyre and wheel on the ground in roughly the right position, line up the bolt holes of the spare wheel with the wheel studs or holes on the car – it’s now easier to lift the wheel straight on.
Tighten all the wheel nuts by hand, starting with the bottom nut, which will hold the wheel in place. Using the wheel brace, gently tighten the wheel nuts – it’s safest to fully tighten them later, when the car has been lowered back onto the ground.
6. Lower the jack
Turn the handle slowly to lower the jack until the new wheel and tyre takes the weight of the car, then slide the jack out from under the car. Just like when you loosened the nuts, keep a straight arm and back, and with the wheel brace horizontal to the ground, use the weight of your body to tighten each wheel nut.
Place the jack and wheel brace back in the boot – you have finished changing your flat tyre!